Post Production Studio
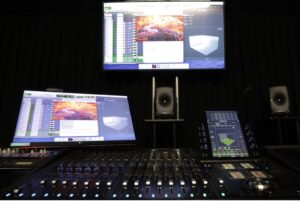
The audio post-production studio in the Conservatorium building is a bookable space that can be used to produce stereo, surround, or immersive audio content.
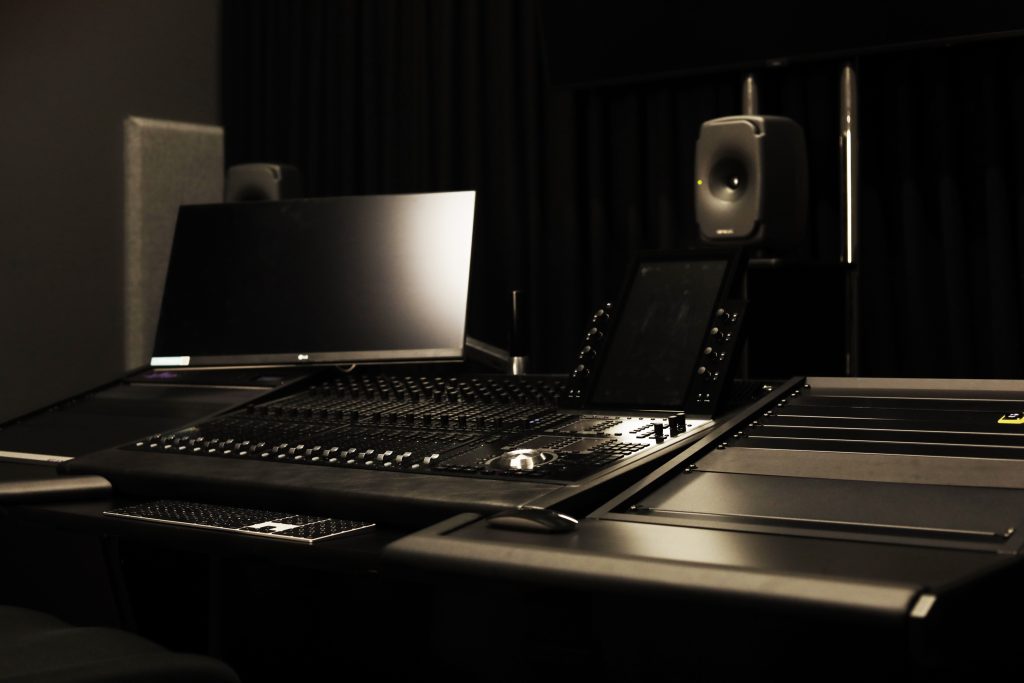
Details
Location
CON222 – Level 2, Room 222, Conservatorium of Music
Induction Requirements
Level 1 General Induction
Level 2 CON222 Post Production Induction
Access Hours*
Monday – Friday 8am-9pm
Weekends Closed
Public Holidays Closed
*Card access and relevant inductions are required, noise restrictions apply
Overview
Access & Usage
To access the CON Ground Floor Studios you must complete:
- Level 1 HCISS General Induction
- Level 2 CON222 Post Production Induction
These can be found embedded in your aligned Course Canvas site:
Your Course > Modules > Compulsory WHS Inductions

Accessing the CON Traka Box
Pre-Requisites
The CON (Conservatorium of Music) Traka Box contains keys to the practice rooms, rehearsal spaces, and music studios. To access these, you must successfully complete the Level 1 General Induction each calendar year as well as additional specialist inductions, these can be found in the Induction Catalogue:
After successful completion of the inductions, you must book your desired room via the Room Booking System:
In the Conservatorium of Music, once you have booked your space, you are required to use the TRAKA key lockbox found outside the lifts on Level 1 using your student or staff card, to access a physical key to let you into the required room.
Step-by-Step

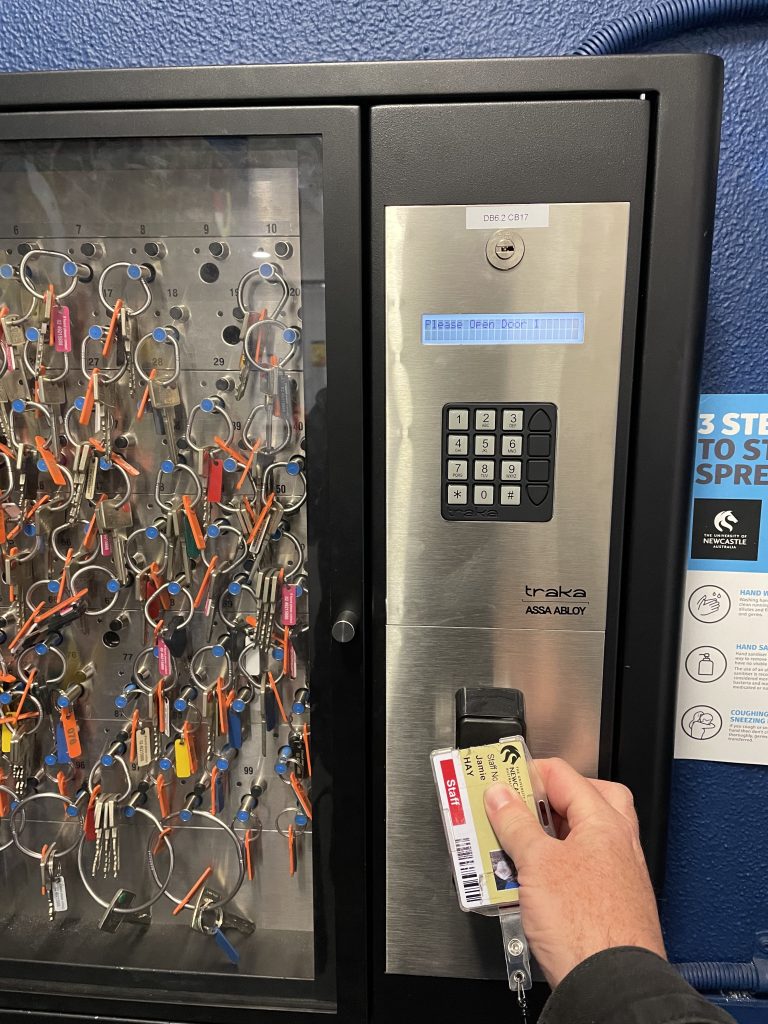
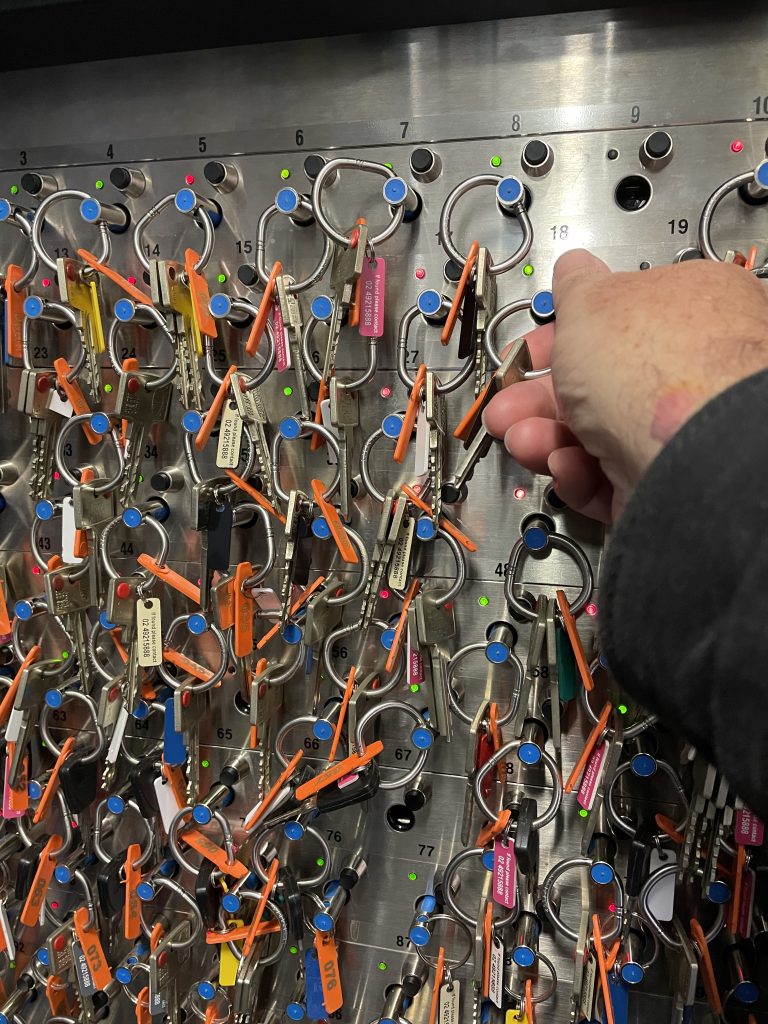
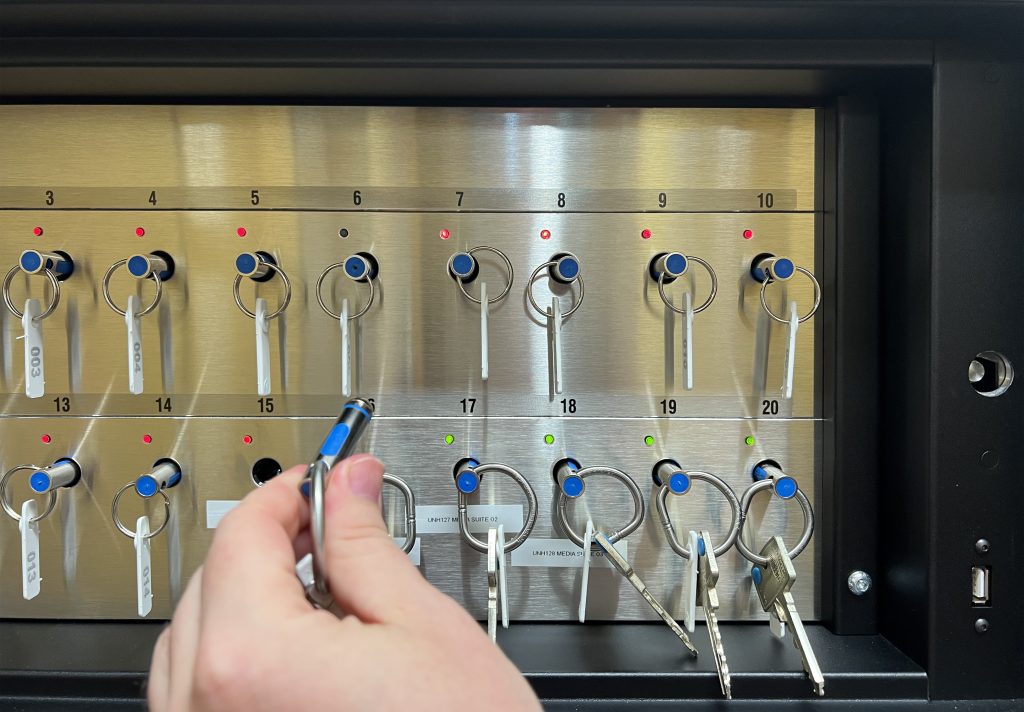
Don’t forget to return your key after use!
Available Equipment
- Apple Mac Pro with Pro Tools, Logic, and Ableton Live software
- 5.1 monitoring
- Avid S6 Control Surface with MTRX
- Ambisonic decoding and conversion plug-ins
- Dolby Atmos Renderer software
Booking the Studio
Once your inductions have been completed and access is approved (3 business days) you will be able to book equipment and rooms using the Booking Point system.
CON222: Start Up & Shutdown Procedure
Start Up
Step 1 (Optional – Only required for recording)
Turn on the Focusrite ISA 828 pre-amplifier
Verify that Word Clock is locked (the Lock LED should be lit). If Word Clock is not locked, press the Clock Select button until the 48KHz option is selected and the Lock LED is lit.

Step 2
Turn on the computer.
Wait for WS Control and DADman to load before launching any other software! These will automatically launch during start-up.

Step 3
All other components remain on (no action required).
Step 4
Launch your Digital Audio Workstation of choice (Pro Tools, Logic Pro X, or Live) and load the CON-222 templates.
Ensure Sample Rate = 48KHz and Bit Depth = 24-bit.

Shut Down
Step 1
Save a copy of your work to an external drive, cloud storage, or similar. You are responsible for the safekeeping of your own work.
Step 2
Quit your Digital Audio Workstation (Pro Tools, Logic Pro X, or Live).
Shutdown the computer.
Step 3 (Optional – Only required for recording)
• Turn off Focusrite ISA 828 pre-amplifier.
Tip: Remember to turn off phantom power before powering down the pre-amplifier!
CON222: Getting Sound In
Step 1
Connect your microphone to the XLR break out box in room CON-223.
Note: Only channels 1-8 active.

Step 2 Optional (only required for phantom powered microphones)
Press the +48V button on the required channel.
Tip: If you are unsure if the microphone requires phantom power, please ask a staff member for assistance.

Step 3
Using the provided CON-222 templates, record arm the corresponding track in your preferred Digital Audio Workstation (Pro Tools, Logic Pro X, or Live).

Step 4
Use the Input button to select Mic and adjust the Gain to taste.
See Focusrite ISA 828 instruction manual for more details.

CON222: Getting Sound Out
Overview
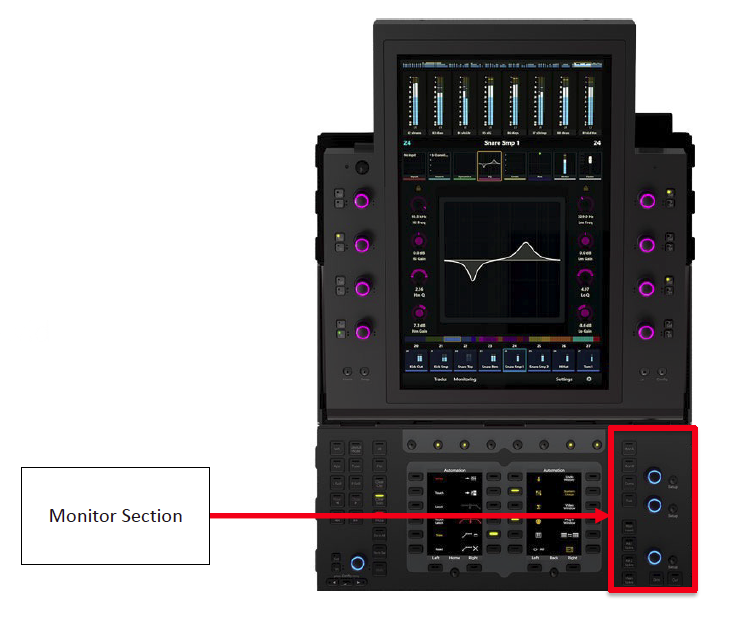
All monitoring functions can be performed from the Avid S6 Master Touch Module monitor section.
Functions include:
- Monitor speaker
- Monitor source selects
- Talk Back
Step 1
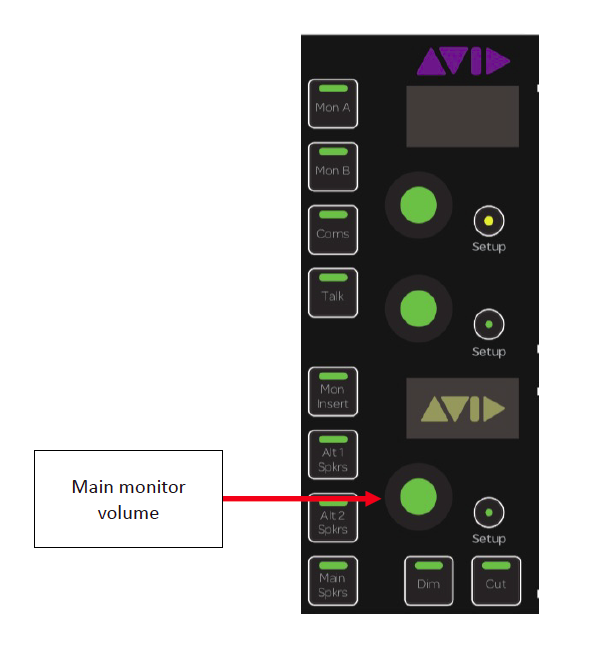
Adjust the main monitor volume using the Monitor Knob.
The following Sources are enabled by default:
- Digital Audio Workstations (Pro Tools, Logic Pro X, and Live)
- Mac OS Preview (iTunes, YouTube, etcetera)
- BYO USB devices
Step 2
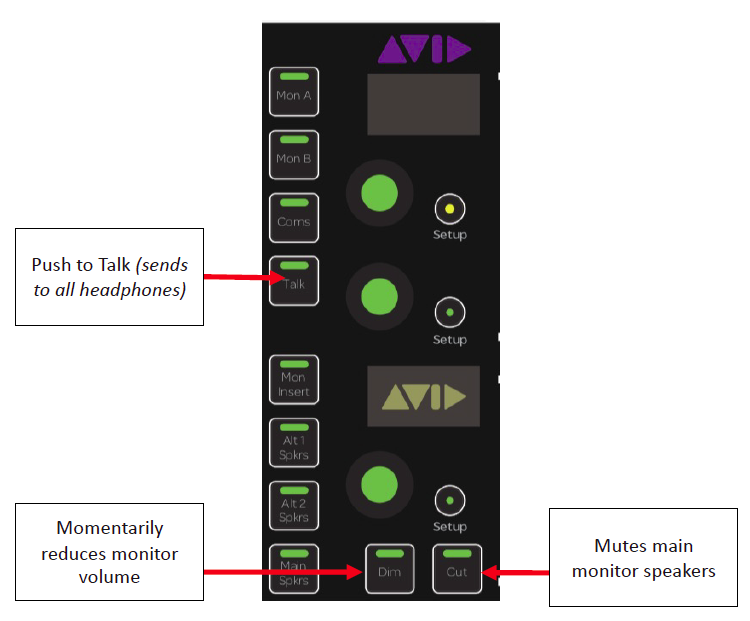
Other monitor functions include Talk Back, Dim, and Mute.
Tip: Do not use the other unassigned monitor buttons.
CON222: Setting up a Cue Mix
Overview
By default, all headphone outputs will mirror main monitor outputs.
• Setting up a dedicated cue mix is optional and can be done from the Avid S6 Master Touch Module.

There are two headphone amplifiers:
- A (Located in room CON-222)
- B (Located in room CON-223)

Step 1
Press the Monitor button on the Avid S6 Master Touch Module. You can use the button or the touch screen.

Step 2
Select either A or B from the Avid Master Touch Module
Tip: Check the Unit ID sticker on the front of the headphone amplifier

Step 3
De-select unused sources from Source Select menu.
Select Cue from the Source Select menu.

Step 4
Press the Home button on the Avid S6 Master
Touch Module to exit the Monitor page.

Step 5
Using the provided CON-222 template, adjust the Cue level to taste in your preferred Digital Audio Workstation (Pro Tools, Logic Pro X, or Live).
Tip: These are Pre-Fader by default.

Further Reading
 Request a specialist Induction
Needing our Help?
The fastest way to get in contact with our technical team is to log a technical ticket. We will get back to you as soon as we can!

